# EDID Spoofing (Game PC)
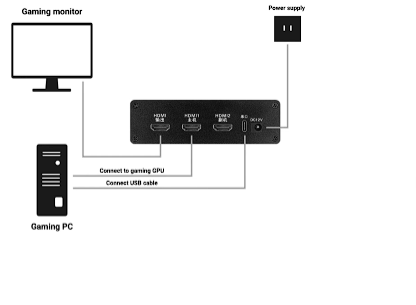
Make sure the cables are connected as show on the diagram
**Step 1: Obtain the EDID of the Main Monitor**
1. **Install MonitorAssetManager:** Download and install the software named *MonitorAssetManager* ([**mi\_setup.exe**](https://www.ducks-services.com/applications/core/interface/file/attachment.php?id=1687\&key=886ad4dcd057dab466bee6834dd668de)). After installation, run *MonInfo.exe*.
2. **Save the EDID File:**
* Open *MonInfo.exe* and select the first monitor listed.
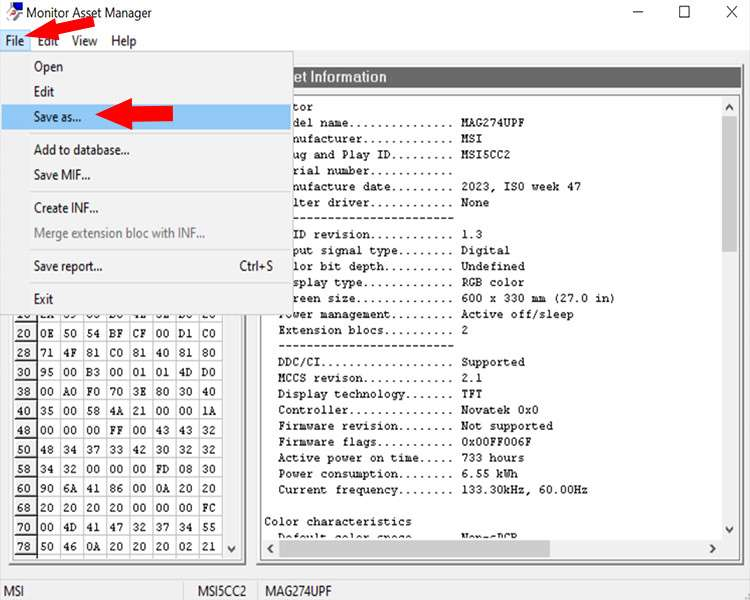
* Go to *File* and choose *Save as...*.
* Select a location to save the file and save it as an EDID Bin file.
***
**Step 2: Inject the EDID into the HDMI Synthesizer**
1. **Connect the Synthesizer Device:**
* With the EDID Bin file saved, connect one end of a Type-C cable to the HDMI device's Type-C port.
* Connect the other end of the cable to the USB port of the computer where the Bin file is saved.
* Plug the synthesizer device into a power source and turn it on.
2. **Open the Injection Tool:** Download and launch the [**EDID Injection**](https://www.ducks-services.com/applications/core/interface/file/attachment.php?id=1686\&key=811e997101c8e105338b977d25392982) tool. (Note: If your system lacks Chinese language support, some text may display as '???', but this is not a problem.)
3. **Perform the Injection:**
* Select the serial port number in the tool (this can be found in the Device Manager).
* Choose the appropriate injection location based on your main monitor's resolution.
* Select the 'Load Parameter File' injection method.
* Choose the previously saved Bin file as the parameter file.
* Click on *Inject Parameters* and wait for the process to complete. The screen may go black during the injection. Once the injection is successful, a prompt will appear.
4. **Finalize the Connection:**
* After a successful injection, disconnect the Type-C cable.
* Connect your computer to the monitor using an HDMI cable.
***
**Step 3: Set Up the Monitor**
1. **Adjust Display Settings:**
* Right-click on the desktop and select *Display Settings*.
* Verify that the resolution is correct.
* Scroll down to *Advanced Display Settings*.
* Select the monitor (it should be the model into which you just injected the EDID).
* Set the refresh rate to the optimal value for your monitor.
***
\
Step 4: Configuration
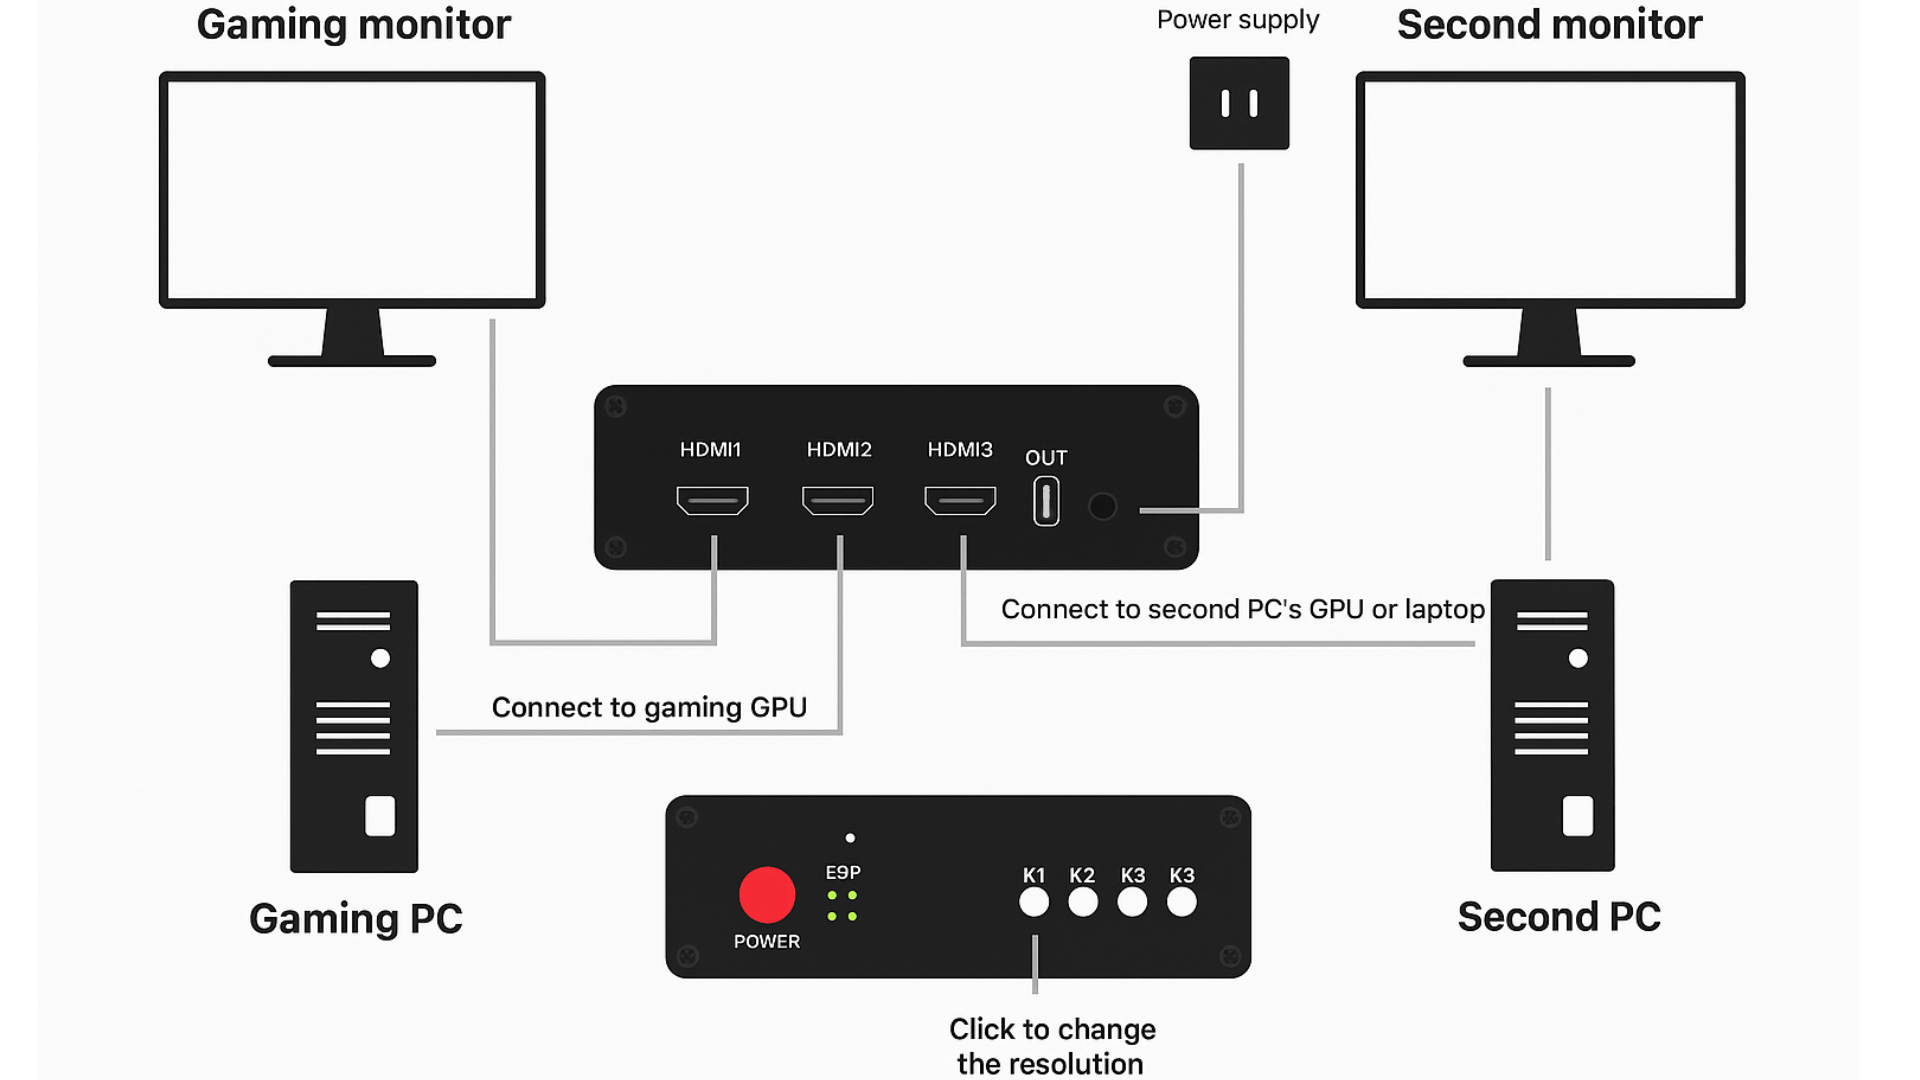
* Hold K1 For 30 secconds
* Then wait 20 secconds
* Then press k4 for the fuser to work
* If nothing happens just wait.
{% hint style="info" %}
If there are any issues, please see the [DMA Troubleshooting](https://huh-or-services.gitbook.io/divisionxguide/dma-card/troubleshooting) section before messaging support
{% endhint %}